
Adding images
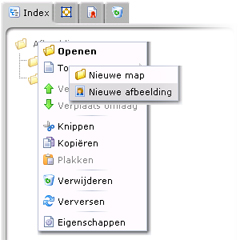
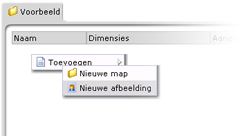
Also this time, a new window will be opened containing a wizard. Inside this wizard, first select the image you wish to upload. Push the button "Browse" and you will be able to select the concerning image from your own documents. After you select the image, the name of the image file will be entered as its title by default. After you checked this title, push the "Finish" button to add the image to the system. Optionally you can push the "Next" button to enter a description for the image. After you selected an image and pushed the "Next" or "Finish" button, an information window will appear, saying that your image is being uploaded. This can take a few moments. It is not wise to interrupt this process by closing the window or push the "Next"/"Finish" button again. However, you don't have to worry if you accidently do: the system cannot be damaged this way, although it is possible that the image is present inside the system more than once. After pushing the "Finish" button, the image is placed inside the system and the folder content is refreshed. Now, you can use the image on your website.
It is also possible, when you add an image to your text inside the text editor, to immediately add an image to the system, and use the image inside your text. Doing this is a combination of inserting an image inside your text, and adding an image to the system, as described here. If you would like to know about this, we redirect you back to "Pagina's bewerken - Stap 3.3".
Attention: